excerpt from my build journal:
So, with no time to waste, this weekend I pulled off the pieces I want to have refinished. I was up in the air between polishing and chrome but after talking to quite a few people about it I think I'll be happier with the long term condition of chrome over polishing. I'm on a tight time schedule to get everything done and have been pretty dedicated this week to planning, organizing, and executing.
Most of this was pretty straightforward, however the big bear of all of this was stripping down the throttle body to its bare housing. This wouldn't have been necessary for polishing, but the chroming process involves dipping the parts in some pretty harsh chemicals so any seals or other materials that could be damaged need to be removed first.
I took photos throughout the process but to be honest, I'm nervous for the day I have to put the throttle body back together. I've got a few dozen loose pieces now which all have to be assembled and arranged properly, springs that have to be preloaded, sensors that have to be calibrated... ugh.
On top of this, I had to remove the throttle plate, rod, and seals as the last step, which I am happy to say I completed tonight (with some much appreciated help from Ivan and Antony) but it was kinda sorta a bitch. I had attempted to follow the advice of some machine shops on disassembly, but no luck. Ended up drilling out the 2 screws holding in the throttle plate very carefully as not to damage the threads on the throttle rod, and now I'll have to find replacement screws for reassembly.
Ok, enough talk. Just figured I'd explain the process for my own documentation, and for anyone else's twisted interest. Keep posted for some shiny things coming up in the near future, and one more piece of purple flare too.
Here are some of the photos of the process, not terribly exciting but whatevs...
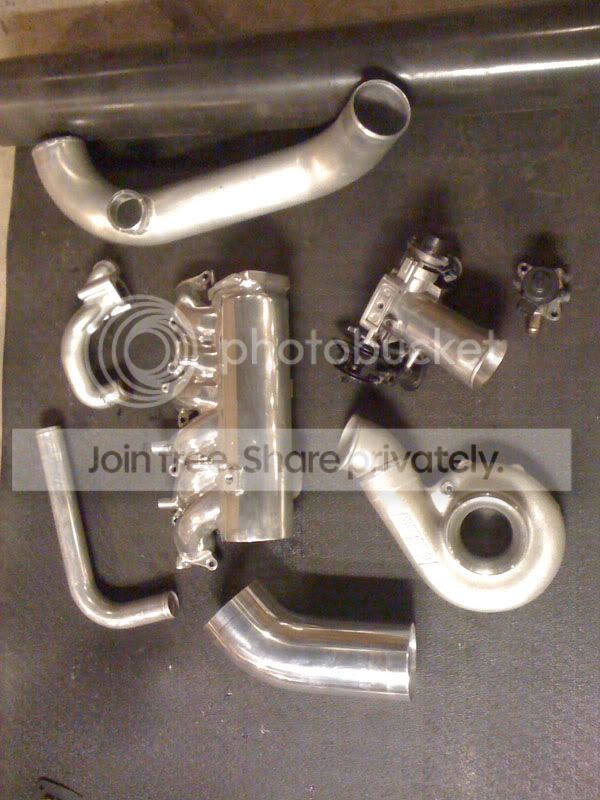
Here are the parts destined for chroming (edit: i'm polishing everything now due to complications in chroming, so i didnt need to take the throttle plate out! damnit... oh well)
Starting out and taking photos as I went...
nerve racking... dont mess up! if you look close you can see one bolt head carefully drilled off, and the other part way there. hint: 9/64 bit is a winner for this one, and easy does it. don't drill too deep, you can't go past halfway through the rod where the threads start.
this makes it look all too quick and easy, but here's the finished product after getting the throttle plate and rod out, and pulling the rubber seals.